
HOW TO MAKE GREAT DIY SWIM FILM – TOP TIPS #2
See the original article on Outdoor Swimmer here!

Week 2 - Prepare
Last week we focused on three things that should be in place before starting to film: camera, purpose and story. So before we start our cameras rolling, let’s use the following as an example before looking at format, shotlist and direction.
Camera:
A smart phone with a built-in camera and microphone.
Purpose (what's the film about):
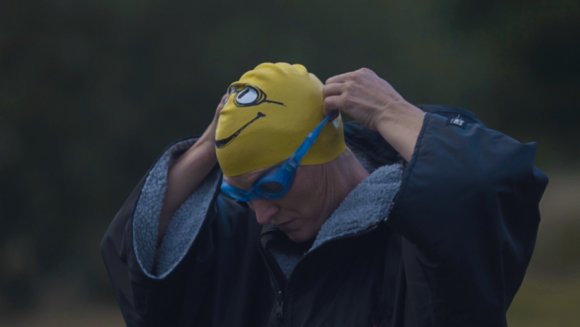
A short film featuring an open water swim on a cold November morning.
Story:
Start point is the arrival of the swimmer at the river or lake. The conflict is the moment of entering the cold water. The end point is the swimmer departing or swimming away into the distance.

1. Decide on format and duration
It's important to decide on the format and the duration of the film because it determines the creative approach, the complexity of the story and the amount of shots required.
Our film is factual, in a documentary style format, and will be 1-2 minutes long. It contains an interview in which the swimmer talks about the experience of going swimming in the winter, the way the cold water feels on their skin and the effect it has on the rest of the body, the breathing, the mind etc. The interview is audio only.

2. Make a shotlist
A shot list is exactly what it says: a list of the different shots you need to tell your story. The list can be as simple or complex as you like and can live in your head, on a piece of paper or on your phone.
Your film will be more dramatic (and a lot easier to edit) if you vary the size of shots, and explore different aspects of the scene: a wide shot establishing the surroundings and closer shots that reveal the season, the weather and the time of the day; a mid-shot of the person entering the scene and a close-up revealing their features and expressions.
This is also the time to decide on your most important shot, the moment your swimmer enters the water.
You will probably only have one chance to capture this moment, so prepare and plan for it. Arrive at the location in good time, ideally before your swimmer, so you can to do a quick recce and find the best camera positions. It'll mean that you will be able to work more efficiently and get better results.
And remember, films are rarely shot in chronological order. For example, 'pick-up shots' or general views of the surroundings can be done at any point after you've captured the main event.
3. Direct
Talk things through with the swimmer before you start filming and give minimal directions to clarify the sequence of events and key positions, for example the point where the swimmer enters the water. Remember that you're working in a documentary format; your participant is not an actor who can, or even wants to, repeat certain actions, especially facial expressions. So, follow the action, let it flow and develop at its own pace.
However, if there are a couple of (non-emotional) moments you really feel are not right, kindly asked the swimmer if they could repeat them.
Focus on the main moment, the conflict, when the swimmer enters the water. Can you capture the various emotional states: the anticipation, the reluctance, the excitement and the joy? If you can show that, you'll have a great DIY Swim Film.
So, we're now ready to start filming. See you next week for lots of practical tips.